Installation Guidelines & Recommendations
 Download RAILOCK™
 - Consult local building codes for proper height and placement of railing.
- Bracket is not intended for exterior use or where high humidity is present.
- Oval wall bracket must be fastened securely to wall framing or backing.
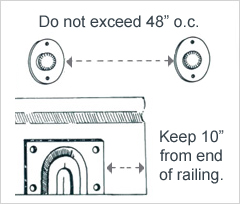
Bracket Spacing
Spacing of mounting brackets shall not exceed 48" o.c. and shall not exceed 10" from either end of railing.
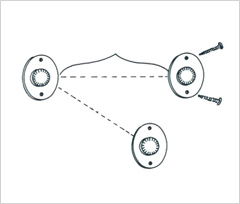
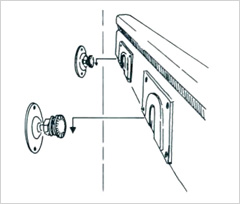
Step 1
Determine proper height of railing and placement of oval wall brackets. Mark the location of the two screw holes for each bracket. Drill appropriate sized pilot holes and fasten each bracket with two #12 x 2 1/2" screws provided.
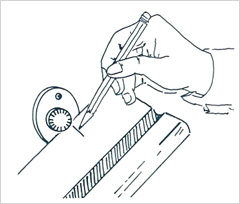
Step 2
Determine proper height of railing and placement of oval wall brackets. Mark the location of the two screw holes for each bracket. Drill appropriate sized pilot holes and fasten each bracket with two #12 x 2 1/2" screws provided.
Step 3
Determine proper height of railing and placement of oval wall brackets. Mark the location of the two screw holes for each bracket. Drill appropriate sized pilot holes and fasten each bracket with two #12 x 2 1/2" screws provided.
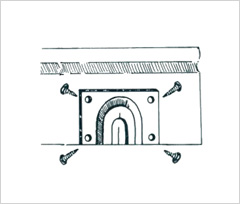
Step 4
Determine proper height of railing and placement of oval wall brackets. Mark the location of the two screw holes for each bracket. Drill appropriate sized pilot holes and fasten each bracket with two #12 x 2 1/2" screws provided.
Concrete or Masonry Wall Installation
Same as above, except use 1/4" x 1 1/2"(min.) sleeve or wedge type anchors instead of the #12 x 2 1/2" screws.
Steel Stud Wall Installation
During construction install wood backing in locations of the oval wall brackets. Retrofit same as above, except use two 1/4" toglle bolts per oval wall bracket instead of the #12 x 2 1/2" screws.